
Microsoft 365 Life Hacks > Writing > How to choose a topic for your essay assignment

How to choose a topic for your essay assignment
Sometimes writing the essay isn’t the scary part—sometimes it’s knowing what to write about that’s the challenge. Learn how to choose an essay topic to play to your strengths and keep you writing.

Finding your essay topic using leading questions
Here are some basic questions to ask yourself when it comes to choosing an essay topic:
- What type of assignment is it? You can’t necessarily write about your summer vacation for a persuasive essay, or about the dangers of smoking for a narrative.
- How much time do I have? If you’re short on time, best to pick something that won’t involve a lot of new research, or that you already have access to information about.
- How much space do I have to fill? You may not want to choose a topic with a lot of intricate detail or a future memoir idea for a thousand-word essay, but longer assignments will need richer material.
- Who’s my audience? This can help you discern how much detail you need or what approach you should take. It can also help inspire you to write if you image an ideal reader who really, really wants to know what you have to say or wants to argue with your conclusions.
- What am I already interested in? It’s much easier to buckle in for writing multiple pages or doing hours of research on something that you already care about or were looking to learn more about, rather than something you don’t feel passion for, or actively dislike.
- Is my topic too broad or too narrow? “Whales” are fascinating, but there are so many different types of whales. “Humpback whales” might even still be too broad, whereas humpback whale behavior or humpback whales in a particular geographic location might be a better fit or possibly too narrow, depending on the size of your paper and available information.
- Why do I want to write about this? This isn’t just related to what kind of assignment it is. Answering this question can help you figure out the thesis, or main idea, of your essay, the direction of your argument, and what supporting information you’ll use to make your point.
- What can I say about this issue that’s new? You don’t necessarily want to rehash existing arguments, retell plots or repackage common knowledge. You need to put your own spin on what you write, whether it’s explaining the meaning and implications for you or others like you or combining details in a novel, unexpected way.

Write with Confidence using Editor
Elevate your writing with real-time, intelligent assistance
It’s also totally fine to shift your topic or direction after a little initial research and writing. Sometimes, writing teaches you things or you discover that you don’t have enough passion or material to flesh out an entire essay. Hopefully, you discover that early in the process—and thinking about the above questions can help you avoid having to find a new topic.
Some essay topic ideas
These ideas and approaches won’t work for every essay, but they can help inspire you to start thinking, or you can borrow and modify them for your own work. You can even combine parts of a few ideas for a more comprehensive approach to any given topic.
- Compare and contrast. This involves taking two topics that ideally have some pre-existing relationship with each other and figuring out how they’re alike and different, and perhaps what those similarities and differences mean.
- The first time I ever… Good for a narrative-style essay , this will involve you mining your memories for a notable moment. You can talk about what stood out for you at a particular place or about a particular person, or how you learned to do something.
- The moment something changed. These types of moments usually are memorable, even life-altering, providing plenty of opportunity for descriptive, narrative detail. This can also be an approach to an expository essay that discusses the results or implications of a particular historical or cultural shift.
- The history/future of… This could be an approach to an expository essay about science or technology topics, particularly those that have a long tradition or many exciting recent advances in knowledge.
- How to do something or how something works. Not just an explanation, this can also involve discussing the history of the process, its implications and results, or alternative techniques.
- Why you should or shouldn’t do something. Often the basis of a persuasive essay , this can involve the pros and cons and an action’s impact on the environment around it, including people and place.
Asking yourself some thoughtful questions as you begin to contemplate your essay can help make picking a topic less daunting. And thinking about how to approach potential topics can help you decide whether they’re worth committing to long-term.
Get started with Microsoft 365
It’s the Office you know, plus the tools to help you work better together, so you can get more done—anytime, anywhere.
Topics in this article
More articles like this one.

Is it 'dragged' or 'drug'?
Do you mix up the words "drug" and "dragged"? Learn the difference and when to use each word so you'll never mistake them again

How to write a plot twist in your story
When executed carefully, a plot twist has the power to shock and dazzle your reader. Learn how you can incorporate one into your writing.

What's the difference between a memoir and an autobiography?
Explore the differences between memoirs, autobiographies, and biographies.

When to use 'while' vs. 'whilst'
“While” and “whilst” are usually interchangeable, but not always. See how they differ and learn how to use them effectively.

Everything you need to achieve more in less time
Get powerful productivity and security apps with Microsoft 365

Explore Other Categories


Research your paper easily within Word
Important: Researcher will be retired starting on January 1, 2025.
Researcher helps you find and cite reliable sources for your research paper in just a few steps.

|
This feature is available only to for Windows desktop clients. |
Note: Researcher is available only in English, French, Italian, German, Spanish, and Japanese.
Research and add content with citations to your document
Note: Researcher uses Bing to pull in the appropriate content from the web and provide structured, safe and credible information.
On the Reference tab, in the Reference group , choose Researcher .

In the search box, type a keyword for the topic you are researching and press Enter.
The Results pane shows a list of sources you can use in your document.
Choose a topic in the Results pane to explore in detail.
Tap the plus sign on the upper right hand corner of on any result to begin an outline for your research topic. This adds the result as a topic heading in your document and saves a link to the result in a comment.
When you are exploring the text in the Results pane and do one of the following:
Choose Add to add only text to your document.
Choose Add and Cite to add text and also include citation for your source.
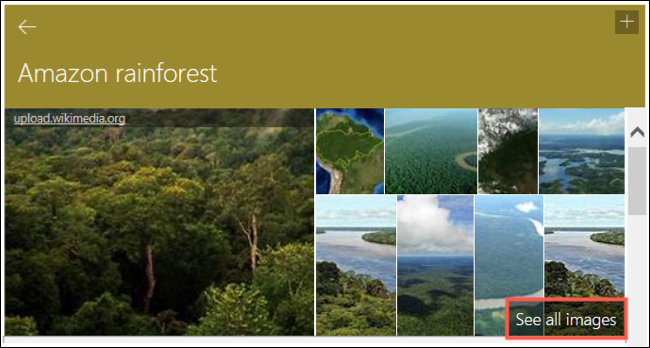
Tap See all images to open the image gallery. Choose the plus sign to add the image to your document
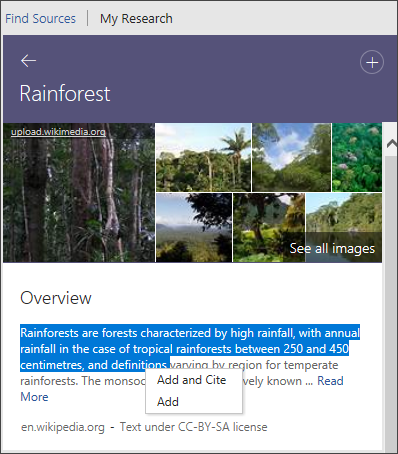
After you add text or image, you are prompted to update your bibliography.
Choose Update to automatically create or update your existing bibliography.
Editing Citations
To edit, choose the citation and select the drop-down.
Select Edit Citation .

See Add or change sources, citations, and bibliographies for more information.
Note: This feature is only available if you have a Microsoft 365 subscription . If you are a Microsoft 365 subscriber, make sure you have the latest version of Office .
On the Reference tab, choose Researcher .

Tap See all images to open the image gallery. Choose Add image to add it to the document
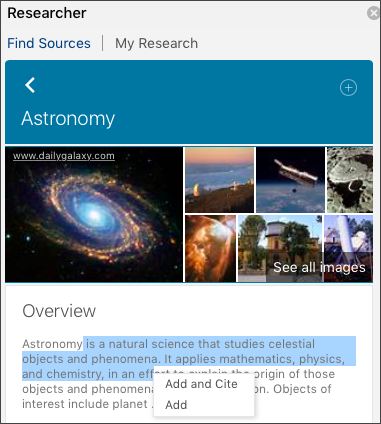
For a quick overview of the feature, check out the video below
Choose Edit This Citation... .
See Editing citations for more information.
Create a bibliography

Need more help?
Want more options.
Explore subscription benefits, browse training courses, learn how to secure your device, and more.

Microsoft 365 subscription benefits

Microsoft 365 training

Microsoft security

Accessibility center
Communities help you ask and answer questions, give feedback, and hear from experts with rich knowledge.

Ask the Microsoft Community

Microsoft Tech Community

Windows Insiders
Microsoft 365 Insiders
Was this information helpful?
Thank you for your feedback.
How-To Geek
How to use researcher in microsoft word for essays and papers.

Your changes have been saved
Email is sent
Email has already been sent
Please verify your email address.
You’ve reached your account maximum for followed topics.
Quick Links
What can you do with researcher, open researcher in microsoft word, review relevant topics and top sources, add topic items to your document.
Microsoft wants to make your research easier. With the Word Researcher tool, you can close your web browser and get sources for school essays, research papers, and similar documents in a few clicks.
The Researcher feature, powered by Bing, gives you a handy search box to find people, events, places, and concepts. The results of your search provide you with relevant topics and top sources including books, journals, websites, and images.
When you select the source you want, you can see an overview, history, location, images, and other important details. And the best part is, you never leave your Microsoft Word document.
In addition to viewing the details for your topic, you can start an outline for your paper as well as adding and citing text. Click the main subject or one of the information sections and add it directly to your document.
Here, we'll show you how to reduce the time you spend researching and speed up the creation of your paper with the Researcher tool in Microsoft Word.
At the time of writing, Researcher is available with Word for Microsoft 365, Word for Microsoft 365 for Mac, and Word 2016. It is available to Microsoft 365 subscribers for Windows desktop clients.
To use the Researcher tool, open the "References" tab of your Word document. Click "Researcher" from the "Research" section of the ribbon.
When the pane opens on the right, type a term into the Search box and you're on your way!
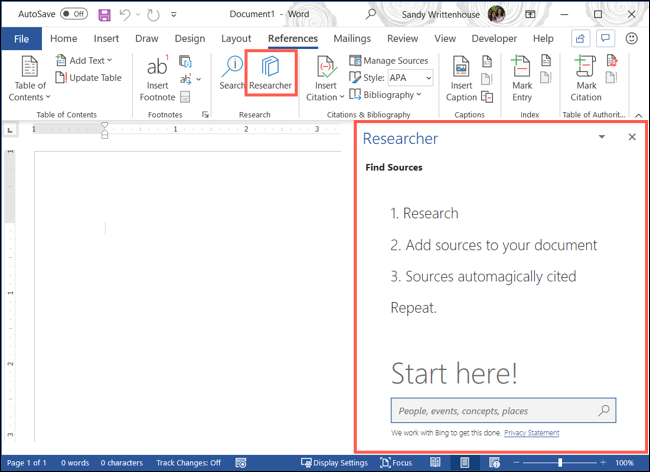
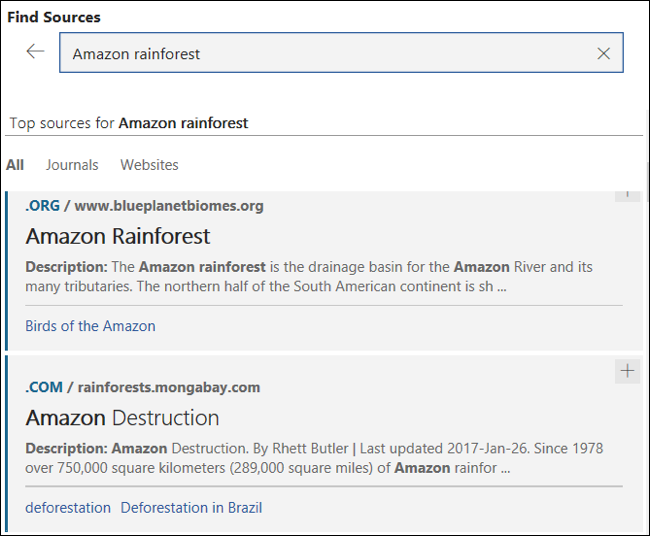
You'll receive results for your search with Relevant Topics at the top and Top Sources beneath.
Relevant Topics
Some topics may only give you a couple of Relevant Topics. Click "More Topics" below that section to see additional sources.
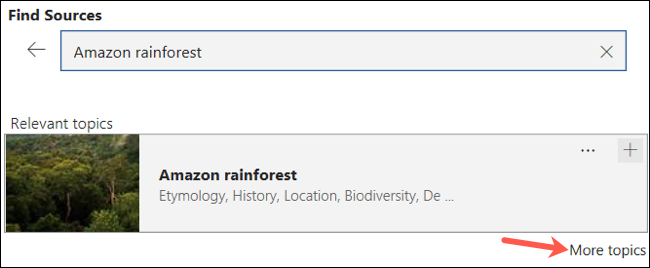
If you click one of the Relevant Topics, you'll see a nice overview of the subject. At the end of the "Overview" section, click "Read More" for full details.
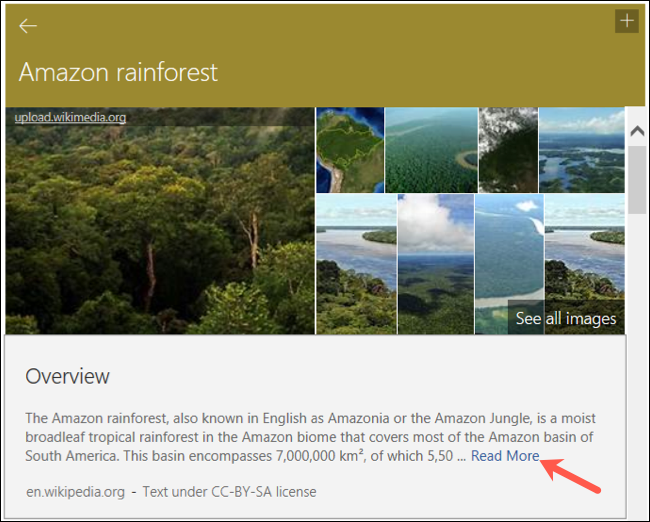
Depending on your topic, you'll then see several block sections packed with details. This structure comes in handy for starting your outline with them, which we'll describe below.
If the subject and Relevant Topic have images, you can click "See All Images" for a neat grid of photos and illustrations. Click one to open your browser and view the image online. Plus, you can add these to your document, which we'll also show you below.
Top Sources
For even more options, the "Top Sources" area offers books, journals, and websites. Select any one of those for its details.
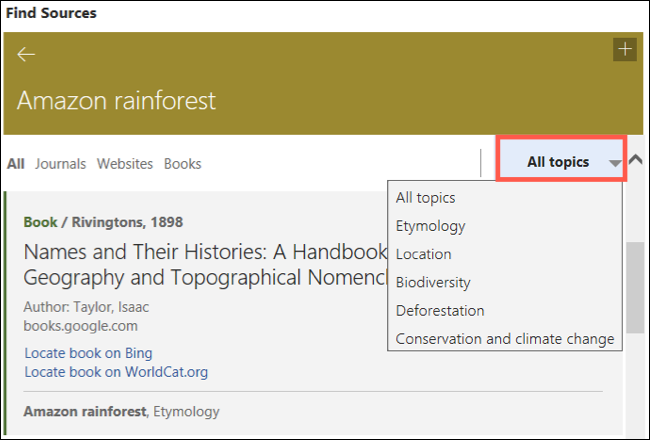
If you choose a Relevant Topic at the top first, you can then filter your Top Sources by subtopic. Click the drop-down box for "All Topics" and pick one.
While most of the material is contained within Word, you may come across a source here and there that you must open in your browser. Click the link to open the source site in your default web browser.
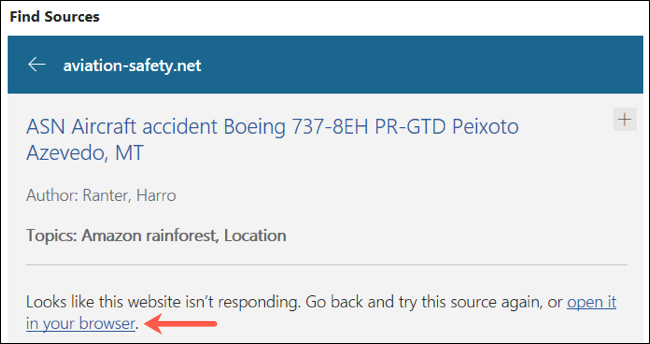
Along with viewing information on your topic, you can add headings, text, and images directly to your document using Researcher.
Add Headings
On the top right of each source's section, you'll see a plus sign. Click the "+" icon to add that section as a collapsible heading for your document outline. Remember, this only adds the heading, not the text, within the section.
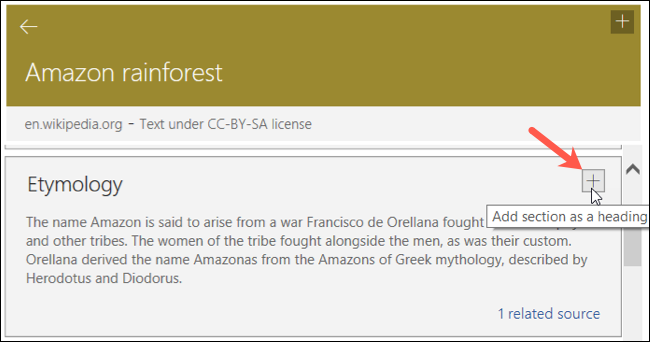
If you want to add a snippet of text to your document, you can do this as well. Select the text from the source by dragging your cursor through it. When you release, you'll see a small box appear with options for "Add and Cite" and "Add."

When you choose "Add and Cite," the text will pop into your document with the source cited at the end of the snippet. The citation is formatted automatically, so you can add it to a bibliography easily.

When you choose "Add," the text will still appear in your document, but without the citation.

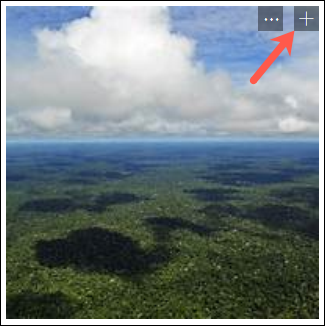
If your topic offers images, and you click "See All Images," you have the option to add one or more of those, too. This is super convenient because you don't have to hunt them down yourself.
Click the "+" icon in the corner of the image to add it to your paper.
It will appear in your document with the source cited beneath it.
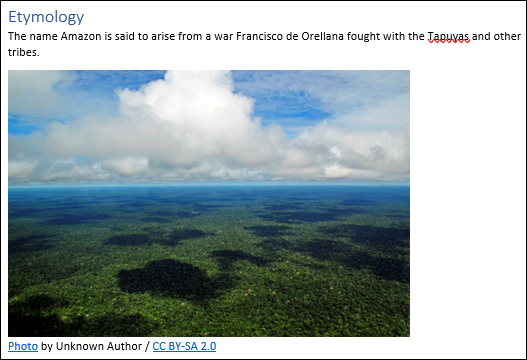
Be sure to respect copyrights when using the available images for your purpose. If you're unsure whether you can use an image, click "Learn More" above the image grid. This takes you to the Microsoft legal webpage explaining copyright and offering FAQs. You can also check our article on images with a Creative Commons License for those sources from Creative Commons.
College essays and research papers are enough work in themselves. By using Researcher in Microsoft Word, you can ease the burden of the research for your document and get a jumpstart on its contents.
- Microsoft Office
- Microsoft Word
- Skip to main content
- Skip to secondary menu
- Skip to primary sidebar
- Skip to footer
Erin Wright Writing
Writing-Related Software Tutorials
How to Use Microsoft Word (10 Core Skills for Beginners)
By Erin Wright
Do you want to learn how to use Microsoft Word quickly? This tutorial teaches ten core skills for beginners.
Table of Contents
How to Start a New Document
How to change the font, size, and color, how to change the alignment, line spacing, and indentations, how to add headings, how to change the margins, how to add images, how to add page numbers, how to add headers and footers, how to run the editor (spelling and grammar check), how to save and print your file.
Please note that this is a quick start guide. I have in-depth tutorials for most of these topics for those who would like to learn more.
Watch all the steps shown here in real time!
Explore more than 250 writing-related software tutorials on my YouTube channel .
The images below are from Word for Microsoft 365. These steps are similar in Word 2021, Word 2019, and Word 2016.
We will cover these ten core skills in Word for Mac in a separate tutorial.
- Open Word on your computer.
When Word opens, you will be in the Home screen of the Backstage view.
- Select Blank document to start a new document. (Alternatively, select Open if you want to open an existing Word document.)

When the new document opens, you will be in the Home tab in the ribbon , and your cursor will automatically be placed towards the top, left-hand corner of the page, ready to type.

You can change the font, size, and color before or after you type text. However, if you want to change existing text, first left-click, hold, and drag with your mouse to select the text.

- Select the Home tab in the ribbon if you are not already there (see figure 2).
- Select the menu arrow to open and choose from the (A) Font , (B) Font Size , or (C) Font Color menus in the Font group.

If you selected existing text, that text will change immediately. If you haven’t selected existing text, all new text will feature the choices you just made.
Further Reading: How to Change the Font, Font Size, and Font Color in Microsoft Word
Like the font choices shown above, you can change the alignment, line spacing, and indentations before or after you type text. However, if you want to change existing text, first left-click, hold, and drag with your mouse to select the text.
- Select the Home tab, if you are not already there (see figure 2).
- Select the Align Left , Center , Align Right , or Justify button to position the text on the page.

- Select the Line and Paragraph Spacing menu arrow and then choose a spacing option from the drop-down menu.

- Select the Decrease Indent or Increase Indent buttons to adjust the indent as necessary.

Further Reading: How to Adjust Line Spacing in Microsoft Word and Three Ways to Indent Paragraphs in Microsoft Word
You can turn existing text into a heading or choose a heading level before typing the heading text.
- Select the Home tab if you are not already there (see figure 2).
- Select a heading level from the Styles group.

- If the heading level you want isn’t visible, select the More button.

- Select a heading level from the menu that appears over the Styles group.

Further Reading: How to Create and Customize Headings in Microsoft Word
You can change the page margins for your entire Word document at once.
- Select the Layout tab in the ribbon.

- Select the Margins button and then select an option from the drop-down menu.

Further Reading: How to Adjust the Page Margins in Microsoft Word
- Place your cursor where you want to insert the image.
- Select the Insert tab in the ribbon, select the Pictures button, and then select the location of the image:
- This Device lets you choose an image stored on your computer or network server.
- Stock Images lets you choose stock images, icons, cutout people, stickers, and illustrations. The full stock image library is only available to users signed into Word for Microsoft 365.
- Online Pictures lets you search for images through Bing, Microsoft’s search engine.

For this tutorial, we will insert an image stored on the device.
- (For “This Device” option only) Locate and select the image in the Insert Picture dialog box and then select the Insert button.

Your image should now appear in your Word document.
- (Optional) Select one of the resizing handles and then drag the image to a new size.

- (Optional) Select the Layout Options button and then choose how the image is positioned with the surrounding text:
A. In Line with Text
E. Top and Bottom
F. Behind Text
G. In Front of Text
The effect of each option will depend on the size of your image and the density of your text. So, you may need to experiment with several options to find the one most suited to your content.

Further Reading: How to Insert and Modify Images in Microsoft Word
- Select the Insert tab in the ribbon (see figure 13).
- Select the Page Number button and then select a location from the drop-down menu, followed by a design from the submenu.
- Select the Close button to close the Header and Footer tab. (This tab only appears when the Header and Footers areas are active.)

Further Reading: How to Add Page Numbers in Microsoft Word
- Select the Header or Footer button and then select a design from the drop-down menu.

- Type your text into the placeholders.

- Select the Close button to close the Header and Footer tab (see figure 18).
Further Reading: How to Insert Headers and Footers in Microsoft Word
In Word for Microsoft 365, the spelling and grammar check is called the Editor. Your spelling and grammar options will depend on which version of Word you are using. Therefore, your interface may look different than the images shown below.
- Select the Review tab in the ribbon and then select the Editor button. (Older versions of Word will have a Check Document button, instead.)

- Select the corrections or refinements category you want to review in the Editor pane.

- If Word finds a possible error, select a recommendation or select Ignore Once or Ignore All .

Word will automatically move to the next issue within the category.
- Select a new category or select the closing X to close the Editor.

What Is the Difference between the Editor Button and the Spelling and Grammar Button?
You may notice a Spelling and Grammar button next to the Editor button in the Review tab. This button provides a quick way to check only spelling or spelling and grammar without checking the additional refinements reviewed by the Editor.

Further Reading: How to Use the Editor in Word for Microsoft 365
I recommend saving your file before printing just in case there is a disruption during the printing process.
- Select the File tab in the ribbon.

- Select the Save tab in the Backstage view.

- Select the location where you want to save the File.

- Type a name in the File Name text box and then select the Save button.

- Once you have saved your document to a specific location, you can then select the Save icon if you make changes to the document later.

- To print, reselect the File tab (see figure 26) and then select the Print tab in the Backstage view.

- Ensure the correct printer is selected and turned on, enter the number of copies into the text box, and then select the Print button.

From there, follow any additional dialog boxes provided by your printer.
Updated November 26, 2023
- Microsoft Word Tutorials
- Adobe Acrobat Tutorials
- PowerPoint Tutorials
- Writing Tips
- Editing Tips
- Writing-Related Resources

IMAGES
VIDEO
COMMENTS
Sometimes writing the essay isn’t the scary part—sometimes it’s knowing what to write about that’s the challenge. Learn how to choose an essay topic to play to your strengths and keep you writing.
You may already use Microsoft Word to write papers, but you can also use for many other tasks, such as collecting research, co-writing with other students, recording notes on-the-fly, and even building a better bibliography! Explore new ways to use Microsoft Word below.
In the search box, type a keyword for the topic you are researching and press Enter. The Results pane shows a list of sources you can use in your document. Choose a topic in the Results pane to explore in detail.
With Researcher in Microsoft Word, you can reduce the time you spend researching your school essay or research paper. Close your web browser and use Word’s built-in tool.
Learn how to use Microsoft Word today! This tutorial teaches 10 core skills including page numbers, line spacing, and margins.
Microsoft Word for Essay Writing. Some formatting techniques you need to know to prepare an academic essay. Academic Skills Centre • University of Canterbury. www.academicskills.canterbury.ac.nz. Setting up your document. Margins: Select the Page Layout ribbon > Margins. A wider right mar-gin leaves more room for the marker to write comments.