Learn STEM by Doing (and having fun)!


Slime Science Project: Investigating the Science of Slime
Slime might make a mess, but did you know that slime makes a perfect science fair project ?!? Not only can you test various chemistry and physics hypotheses, your kids can also have fun and finish it IN JUST A WEEKEND!! For all those parents out there frantically heading into the last days/hours before the science fair, this is your winner! Our slime science project outlined below walks you through the potential setup from start to finish. It’s one of many!! While you could get adventurous and try working with more elaborate slime recipes (e.g. magnetic slime, glow slime), even our basic recipe can get you a cool slime science project addressing all the requirements of any science fair. Let’s science!
Slime Science Project: An Overview
Below, we outline a few simple experiments to assess different physical properties associated with slime. But first, we delve more into the science behind slime. To be honest, there are truly a TON of directions you can go with this project and the fact that it can be completed in a weekend makes it a great last minute science fair project!
Now, for an easy to read, step-by-step guide about making slime, please be sure to look at our How to Make Slime: The Ultimate Guide post. In that guide, we outline various slime recipes and walk through how to make slime. If you encounter issues in this science fair project, be sure to reference back to that post.
Science of Slime – How Chemistry Affects Physical Properties of Slime

Can’t we just make the slime and call it a day? Sure, you totally can and feel free! However, if you want the kiddos to get familiar with the scientific method (e.g hypothesis generation, experiment design), then read on. Also, if you have a science fair coming up, this is a great project that can be tackled in a weekend from start to finish.
Background: The Science of Slime
What is slime? It’s not a liquid, but it’s not a solid either. So, what the heck is slime anyway?? Well, if I ask the kids, they tell me it’s a gooey, squishy “thing”. If you’ve ever tried to explain states of matter to kids (e.g. solid vs. liquid vs. gas), slime always throws them for a loop. Beyond being a bit of a ‘tweener, slime is a great way to teach kids about how chemical reactions can change physical properties.
So, what is actually happening when we make slime? Ok. If I’m losing you at the word chemical reactions, don’t worry. When we make slime, we take a polymer and link the molecules together. In the experiment below, our polymer will be white glue. The glue consists of a collection of POLYVINYL ACETATE (PVA) molecules (see picture below). We will also be using Borax laundry detergent as our SLIME ACTIVATOR.
What’s so magical about Borax? Well, it happens to contain borate ions (see the picture below – that B with the four arms). When you mix Borax and glue, the borate ions start to “hold hands” with the PVA chains in the glue. The dotted lines and solid lines below represent CHEMICAL BONDS. These bonds are strong! This means it’s hard to separate the glue from the borate. If you use too much Borax in your slime, you can imagine a lot of kids grabbing on to each other. Impossible to get through and hard to move. Same thing with slime. You will likely get brittle, inflexible material.

With this in mind, our experiment is going to evaluate how CROSSLINKING can effect the stretchiness of our slime. Another word to introduce the kiddos to is VISCOSITY . In simple terms, viscosity is kind of like how “thick” a fluid may be. Compare honey and water – which one would be more viscous? How could you test viscosity?
Who can do this science fair project? 3rd grade and up
We’ve done the slime making with students as young as preschool. However, some of the concepts might be tricky to grasp for younger kids.
Materials – What you need for the experiment

- Mixing containers (old bowls, paper/plastic bowls) . We use these to mix and prepare our slime.
- Mixing sticks (popsicle sticks) . Same thing – mixing slime gets messy, so if you prefer to use popsicle sticks this will help.
- Elmer’s school glue (the white kind – here’s what we use) . Glue = critical reagent! This represents our polymer.
- Borax laundry detergent (the powder kind) . See the picture at the right; as long as the detergent contains sodium borate, that is most important.
- Water . For mixing with the glue, borax and clean up.
- Timer . We will use for a few things.
- Funnel . Pouring liquids through a funnel is one way to measure viscosity – we will use it for our slime!
- Tape measure . For stretching out and measuring how “gooey” the slimes turn out.
- Lotion (whatever you have in the house) . This is an oil that we are adding.
- Paper / pencil / camera . Always be sure to record the data!
Designing the experiment: picking a hypothesis
Before we get our hands wet (ha!), we need to think about our experimental design. If you’ve read through some of our other experiments ( germiest spot in school ), then you might remember that a HYPOTHESIS is essentially a guess about what you think will happen in the experiment. There are literally dozens of experiments you can do with slime – which makes it so great – but it can also be hard for kiddos to narrow it down. In this case, since we’ve had our kids ask questions about the “gooey”-ness of slime, we thought it would be interesting to see how stretchy our slime can be, using different amounts of Borax.
Our Hypothesis
Our hypothesis here will be that too much Borax will make slime that isn’t very gooey. How will we test our hypothesis ? Let’s use viscosity! We will measure how viscous the slimes are that we make.
Experimental controls
At this point, we’ll also want to pick out some “controls” to include in our experiment (QUICK question for the kiddos: why is this important? A: to make sure our experiment is testing what we think it’s testing). We need a POSITIVE and a NEGATIVE control. A good NEGATIVE control would not add any Borax at all to the mix – this won’t be gooey. A good POSITIVE control would add Borax to ensure crosslinking occurs. Any other ideas?
Methods/Procedure – How We Will Finish Our Slime Science Project:
For our slime science project, we will be examining the impact of crosslinking on slime viscosity. In other words, we will be adding varying amounts of Borax to our slime to see how it impacts the “stretchiness” of our slime. We will also incorporate another ingredient (lotion) to see if we can counteract the effects of too much crosslinking. While you’re on your own with the science fair project board, there should be enough info to make your own. How long this will take you from start to finish? Assume about 30 minutes of setup/prep time, about 1 hour for making slime/testing, and 1 hour to analyze.
Setting up your materials
Before you get started, make sure you have plenty of disposable bowls and mixing sticks… while you can use non-disposable items, this makes cleanup a little faster/easier. We also want to organize the VARIABLES in our experiment. The table below illustrates the different conditions we tested. We will make seven different slime batches to COMPARE the different conditions. Additionally, you can make duplicates for each set of conditions if working with a partner.
#1 acts as our NEGATIVE control. Without Borax, we just have glue and water. #2-#5 test how changes in the Borax amount effect viscosity and stretchiness. #6 and #7 are an EXTRA experiment that adds lotion to see how it influences viscosity. If you have different ingredients you’d like to try, give it a go! As you set up materials, label the different bowls so you remember which condition you are testing.
Make sure the kiddos GUESS / HYPOTHESIZE which slime will be the stretchiest and which will be the most viscous. Without further ado…. let’s make slime!
Making the slime
- Prepare the Borax solution . First, dissolve 1 teaspoon of Borax detergent in 1 cup of warm water. Mix until everything disappears, then set the solution to the side – we won’t use it until we’ve mixed our glue/water solution in step #3.
- Prepare the glue . Next, in the different containers, add the correct amount of glue to each container. Pour in the appropriate amount of water. Ideally, we are sticking with a 1:1 ratio of glue:water. COULD YOU TEST THIS VARIABLE? Absolutely!!!
- Mix the glue/water . BE WARNED: You will probably get messy. Stir vigorously to get the water/glue mixed up. You can add a few drops of food coloring or glitter if you’d like. Also, mixing can be done with a spoon at this point – our favorite approach uses paper bowls and plastic spoons or popsicle sticks to stir.
- Add Borax solution . At this point, you will want to add the correct amount of Borax solution to each bowl. This solution is what we prepared in the first step. Remember, this step CROSSLINKS the glue molecules… it goes from sticky to gooey. You can mix with your hands or a spoon. SUGGESTION: only add a small amount of borax at a time – mix – then add more. Whatever you do, try to be consistent across the different batches.
- Kneed it/mix it . Keep stirring as you add the Borax solution. When the slime is starting to come together, you’ll need to start mixing with your hands. RECORD your observations for each batch – how does it feel? Do some combinations mix better/easier than others? When done with mixing, you’re ready to begin testing it. If you are using #6 and #7, now is the time to mix in the lotion.
- Clean up . Word of warning – do not pour slime components down the drain . You risk the material solidifying or getting stuck in your pipes. Wrap up waste and throw out in trash.
Testing the slime
Testing viscosity of solutions isn’t as hard as it sounds. One trick uses a cylinder filled with the fluid. A ball bearing is dropped in the fluid and timed to see how long it takes to go from the drop to the bottom. Solutions with higher viscosity means it takes longer for the bearing to reach the bottom. If you don’t have a cylinder handy, an alternative is pouring the solution through a funnel with a small opening. Same concept – fluids with higher viscosity take longer to pour through the funnel.
At this stage, record how long it takes for the different slimes to flow through the funnel.
How else can we test the slime? You can also try to see how far the slimes pull. This uses the tape measure. First, have one person hold the slime at a “starting point”. Using paper and your tape measure/ruler, measure how long the slime pulls without pulling apart. Don’t forget to take pictures! Are there other tests you can think of to compare the slimes?
Results – Data Analysis
You made it! Way to go!! If you’ve finished all seven slimes and testing, the kiddos have a lot of data to sift through. Using the prior table, you can easily record the results of the tests (see below).
Was the hypothesis proven?
Conclusions: Did your slime science project work?
Wow! Another great experiment under the belt! If things didn’t work out like you thought they would, what do you think could be some good explanations? What would you do differently? Could other variables be important — like temperature? What about the brand of the reagents? Like I said in the beginning, there’s literally a 100 different experiments you can come up with slime!
What were we surprised about? Well, the kiddos were surprised that it “worked”. 🙂 While I’m happy that things came together, there was still troubleshooting that had to be done. They want to make more slimes – but different variations beyond what we did here. How did your project pan out? We love to see science fair projects and the slime science project is no exception – feel free to share those boards!
Leave a Comment Cancel reply
Notify me of follow-up comments by email.
Notify me of new posts by email.

Slime Science Project | Everything You Need to Know
By: Author Charlene Hess
Posted on Last updated: November 2, 2024
This article may contain affiliate links. Please see our disclosure policy for more details.
Homemade slime is becoming an increasingly popular! Slime provides many learning opportunities across multiple subjects, including tactile sensory play, science and chemical reactions, math and ratios, hands-on STEM/STEAM, problem-solving and more and you can learn all about how to make slime as well as the science behind it here!
Typically slime is thought to be a fun activity for younger kids, but there is much to be learned from this fun science activity for older kids too. Slime science is a fascinating thing and if you’re okay with a messy kitchen, you’re in for a day of fun-filled chemical reactions, creativity, and cause-and-effect reactions that even high school students will enjoy.
Using the scientific method, your students are well on their way to discovering the scientific wonders of slime .
Whether you’re looking for the perfect science fair project, an educational activity for your homeschool STEM curriculum , or you just want to have fun with your kids, we’re going to show you the step-by-step process for making slime with your kids.
Easy Navigation
Get a Bonus Free STEM Project Sent to Your Inbox

Want a free STEM project to do with your kids? Click the button below to sign up to have an exclusive project guide sent to you so you can see exactly what to expect from our popular STEM Made Easy Digital Subscription.
Or read more about the other STEM Made Easy Digital Subscription here. Each month includes 5 STEM project guides along with step-by-step instructions, worksheets, and extra learning resources to make STEM fun and engaging for kids ages 3-19.
Slime Experiments and Fun Slime Science Fair Projects
When I was in high school, I was considered a very good student. I found most of my classes to be simple and fun, with one exception: chemistry class. I got my first ever C in chemistry junior year, and to this day I still consider that to be one of the hardest classes I ever took. It’s no surprise that I always put off teaching chemistry to my own kids.
So what does this story have to do with slime? What’s so educational about slime anyhow?
The Science of Slime
The fact is, there is a science of slime. For one thing, slime is chemistry in motion.
Chemistry explains states of matter such as liquid, solid, and gas, and it also explains how these states of matters react under different conditions, especially the formation of new substances.
Slime is a non-Newtonian fluid, meaning it does not conform to the standard rules of fluid dynamics. Unlike water, which has a constant viscosity, slime can change its viscosity in response to stress. This property is what makes slime so interesting to play with and experiment on.
Slime science projects feature an endothermic reaction, meaning it absorbs heat (energy) rather than giving it off. This explains why slime gets colder over time. Then, depending on the recipe you use, certain ingredients change the molecular makeup, also known as cross-linking. Your student can use the scientific method to test which slime recipes and ingredients cause which chemical reactions.
Slime also has unique properties when it comes to its behavior under stress. When slime is stretched or pulled slowly, the polymer chains slide past each other, making the slime more fluid-like. However, when the slime is rapidly stretched or hit with force, the polymer chains become entangled and the slime becomes more solid-like.
Other chemistry concepts that making slime involves are:
- Chemical reactions
- Cross-linking
- States of matter
Talk about fun science activity! It’s no wonder people all over are using this concept as a slime science fair project idea.

Slime is a fascinating substance that makes science for kids fun and engaging. This simple science activity contains some fascinating information.
You can teach your children why glue stays liquid (because it is a polymer made up of identical long strand molecules, called monomers) until a borate ion ingredient is added to the mixture (connecting the long strand molecules together). Throughout the mixing process, these ingredients begin to form a thick, rubbery type substance (eventually becoming slime).
Slime is also a unique substance that can be considered a solid and a liquid (known as a non-newtonian fluid). You can even experiment with making it more or less thick and sticky (viscous/viscosity) by adding foam beads .
The possibilities are almost endless.
Easy Slime Recipes
Use these easy slime recipes and experiment with the elements of slime. Make sure you take good notes so you can use what you learn in your next science project! Consider testing out multiple basic slime recipes, or perhaps multiple variants of the same recipe, during your science project and see what happens when you combine different ingredients.
For example, in the Borax Slime recipe, what happens if you add less borax? Or more? How much borax would you need to add to turn your slime into a rubber ball? There are so many questions and possibilities to discover!
On that note, feel free to download these free, printable scientific method worksheets . Perfect for slime science fair projects or other at-home science experiments.

3-Ingredient Slime (without Borax)
You will need:
- 2 (4-ounce) bottles washable school glue (like Elmer’s)
- 1 teaspoon baking soda
- 2 to 3 tablespoons saline solution, divided
- Optional – 3 drops food coloring
Instructions:
- Pour the glue into a medium bowl.
- Add the baking soda to the glue and stir until smooth.
- If desired, add food coloring now.
- Pour in 2 tablespoons of the saline solution and stir slowly. The mixture should begin to harden, eventually becoming stringy.
- Slowly continue mixing until a ball of slime forms.
- Knead the mixture by working it between your hands until smooth. If the slime is too slimy, work in another 1/2 tablespoon of saline solution as needed.
- Store your slime in an airtight container at room temperature for future play.
Tip: use glow in the dark glue for glow in the dark slime!
Puffy, Fluffy Slime Recipe
- 2/3 cup of Elmer’s White Glue
- 1/2 teaspoon Baking Soda
- 1/4 Cup Water
- 2-3 cups Shaving Cream
- 1.5 Tablespoons Contact Lens Solution (must have boric acid and sodium borate in the ingredients)
- Add the white glue to a bowl.
- Add water and baking soda, then mix.
- Add the shaving cream and mix again.
- Slowly add in contact solution and knead.
Tip: add 1 TSP and knead for 5 minutes, then add ½ TSP and continue kneading.
This mixture will be sticky but will be less sticky as you add more contact solution. Consider adding baby oil to your hands if it’s too sticky. Store in an airtight container for future play
Borax Slime
Remember – borax is a soap (commonly used along with laundry detergent) and is toxic! Keep this in mind when using with young children.
- 1/2 cup White glue
- 2/3 cup Water
- 1 tsp Borax powder
- 1/3 cup Water for making borax solution
- 2 tsp Shampoo
- Make a borax solution by mixing borax powder with water in a bottle and shake the bottle until the borax powder dissolves.
- Mix water, glue and shampoo in another bowl.
- Slowly add borax solution (1 ml. at a time) to the glue mixture and stir it until it is thick and has the slime texture that you want.
- Add some oil to the slime to make it not stick to your hands.
- Knead and stretch until it is the consistency of slime.
Buttery Slime
Ingredients:
- 3 TBS Corn starch
- 3 TBS White glue
- 3 TBS Shaving cream
- 4 Pinches Baking soda
- 2 TBS Contact solution
- 1/2 tsp Baby oil
- Optional – 3 Drops food coloring
- In a bowl, combine corn starch and white Elmer’s glue.
- Add shaving cream and four pinches of baking soda.
- Add food coloring, if desired.
- Add contact solution and mix until it turns into slime.
- Add baby oil and mix well.
***Consider adding glitter, food coloring, and foam beads to any of your slime mixtures to create different kinds of cool looking slime.
Slime Safety & Precautions
Although most basic slime recipes you’ll find here (and across the internet) are typically child-safe, there are a few safety and precaution tips we’d like to share.
For starters, an adult should always be in supervision of creating the slime. Adults should always be the ones handling any ingredients that are considered chemicals, such as borax powder or laundry detergent. Most slime projects are not suitable for children under the age of 4.
If you notice any type of skin irritation, discontinue making, using, and/or playing with slime immediately. In some cases, gloves can be worn while playing with slime. Slime should be played with in moderation and not played with for an extended amount of time. Most slimes are not edible (and none on this page are) so refrain from putting slime in any mouths.
If you are looking for slime recipes that are safe to eat (and perhaps even delicious!) check out this article on edible slime recipes and other edible science experiments .

How to Make a Slime Science Fair Project
With your slime education and recipe, you are now ready to use your slime concoction for a science fair project!
There are many ways you can do this; however, you can’t go wrong with presenting it through the scientific method. The way you work through this method can be what you show bystanders at your science fair.
Navigate through the following prompts to create a project worth remembering:
- Brainstorm a question you’d like to answer.
- Research your question.
- Gather any materials and supplies needed.
- Conduct the science experiment that will answer your question and back up your research.
- Gather data and analyze the results.
- Draw your conclusion and check to see if it answered your question.
Slime science project questions to ask:
- Do you need water in your recipe?
- What happens if you add more or less of something?
- How does the substance change over time?
You can also experiment with creating volcanic slime , glow in the dark slime , magnetic slime , and even UV color-changing slime .
Proper Disposal of Your Slime Experiment
After you’ve finished conducting your slime science experiments, you’ll need to dispose of any leftover slime properly. The following are a few tips for safely disposing of slime:
- Don’t pour slime down the drain: Slime can clog your drains and pipes, leading to costly plumbing repairs. Instead, dispose of slime in the trash.
- Put slime in a sealable container: Before you throw away slime, we advise that you put it in a sealable container to prevent it from sticking to other garbage or leaking out of the trash bag.
- Wash your hands: After handling slime, be sure to wash your hands thoroughly with soap and water.
- Consider composting: If you’re using natural materials to make slime, such as cornstarch or flour, consider composting the slime instead of throwing it away. This can help reduce waste and benefit your garden.
Troubleshooting Common Issues with Slime Science Experiments
Sometimes, your slime science experiments may not turn out the way you expected. Here are some common issues and how to troubleshoot them:
- Slime is too sticky: If your slime is too sticky, it may be because you added too much water or not enough activator. Try adding more activator, such as borax or contact lens solution, and kneading the slime until it becomes less sticky.
- Slime is too hard: If your slime is too hard, it may be because you added too much activator. Try adding more water or a few drops of oil, such as baby oil or cooking oil, and kneading the slime until it becomes softer.
- Slime is too runny: If your slime is too runny, it may be because you added too much water or not enough activator. Try adding more activator and kneading the slime until it becomes thicker.
- Slime is lumpy or grainy: If your slime is lumpy or grainy, it may be because you didn’t mix the ingredients well enough or didn’t dissolve the activator properly. Try mixing the ingredients more thoroughly, or dissolve the activator in hot water before adding it to the slime mixture.
- Slime smells bad: If your slime has a bad smell, it may be because you used expired ingredients or didn’t store the slime properly. Throw away the slime and start over with fresh ingredients, and be sure to store the slime in an airtight container when not in use.
STEM Resources Delivered to Your Inbox Every Month

If you liked this edible STEM activity, you are going to love the STEM Made Easy Digital Subscription . Each month, you’ll receive 5 fully-planned STEM project guides along with worksheets and instructions for how to make them fun and engaging for kids ages 3-19. Check it out now !
What kind of slime will you be making? Let us know in the comments below!
Related Posts:
- Rock Candy Science
- STEAM-Based Homeschooling
- 4th of July STEM Ideas
- Valentine’s STEM Activities
- The Best Online STEM Classes for Kids
- STEAM Art Project Ideas
- Recent Posts
- The Best Documentaries for Homeschoolers - November 7, 2024
- 16 Powerful STEM Activities for High School Students - November 5, 2024
- Easy Ways to Learn Multiplication - November 5, 2024

Educational Activities, Toys, and all things STEM
Slime Science Fair Project Ideas & Experiments
*We’re an affiliate – we may earn a commission through qualifying purchases from the links on this page. As always, thanks!*
It’s hard to land on a fun project for science fairs. Slime is always a winning idea.
From chemistry to physics, slime provides endless opportunities to explore how materials interact, change, and behave under different conditions. There’s plenty of ideas to make slime the perfect science topic for a hands-on, engaging science project that’s both fun and educational.
Whether you’re a student looking for inspiration or a teacher or parent helping to guide a budding scientist, these slime projects are a great way to have fun with science. Let’s explore the science of slime!
Choosing a Slime Science Fair Project
When deciding on a science project, pick something you can stick with (or guide you kids towards something they are interested in.) There’s going to be some time and effort spent, it may as well be on something fun.
Consider Your Interests; What about slime is the most interesting (e.g., texture, color changes, or stretchiness)? Another angle is what aspect of science is most engaging? Is it chemistry, physics, or scientific concepts like viscosity, elasticity, or chemical reactions?
- Chemistry : Polymers, cross-linking, and chemical reactions.
- Physics : Non-Newtonian fluids, viscosity, and elasticity.
- Material Science : How different materials interact to form new textures.
- Experimenting with ingredients.
- Testing environmental factors (like temperature or light).
- Measuring slime properties like stretchiness, durability, or flow.
Slime Science :
If you want to get deeper on how slime works, check out our post on the science behind slime . You can also check out different kinds of slime that you can use for your science experiments and projects.
Project Idea #1: What Happens When You Change the Ratios in a Slime Recipe?
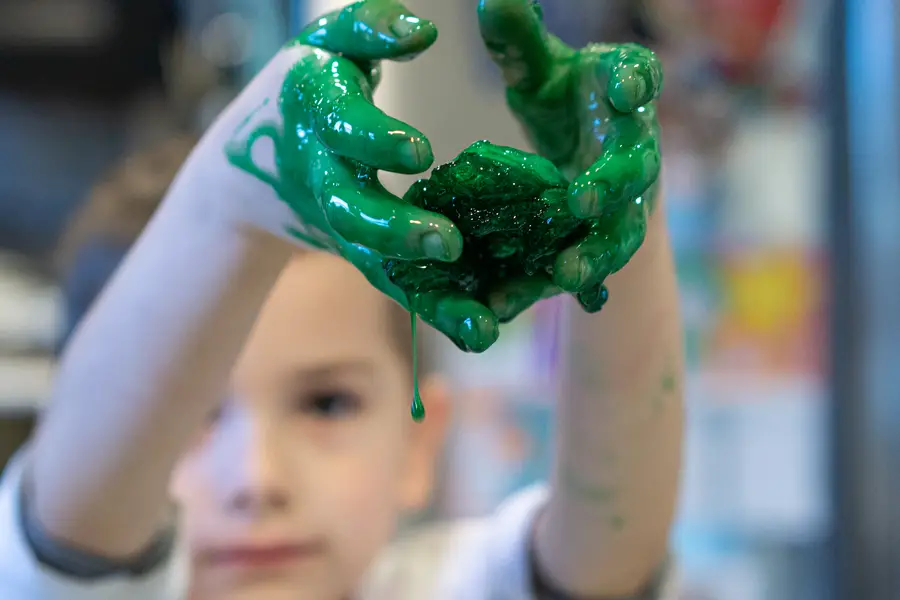
Most basic slime recipes use glue and a borax solution as the basic components. What happens when you change the ratios? What happens when you introduce other ingredients? How do they affect the slime texture, stretchiness, stiffness, smell, longevity, etc.?
- Overview : Test how changing the amounts of glue, borax, or water in a slime recipe affects its properties.
- Purpose : To understand how ingredient ratios change the texture and behavior of slime.
- Materials : White glue, borax powder or saline solution, water, measuring tools.
- Procedure : Make multiple batches of slime with different ratios of ingredients. Test and compare how the slime stretches, flows, and feels. Record your findings.
- Scientific Concept : The role of cross-linking in polymers. Investigate how too much or too little of each ingredient affects the structure of the polymer chains.
Project Idea #2: How Long Does Slime Last?
Slime is great, but it doesn’t last forever. How long does it take to degrade? What changes does it go through? What factors accelerate or slow the degradation? Are there storage methods that can make slime last longer?
- Overview : Investigate how slime’s properties change over time, exploring whether it dries out, hardens, or loses its stretchiness after a certain period.
- Purpose : To study the durability of slime under different storage conditions.
- Materials : White glue, borax or saline solution, water, airtight containers, and various storage environments (e.g., fridge, room temperature, open air, sealed containers.)
- Procedure : Make a batch of slime and store it in different environments. Over several days or weeks, observe and record how the slime’s texture and elasticity change.
- Scientific Concept : Investigate evaporation and how the loss of moisture affects polymers. Explore how different environmental conditions influence the degradation of slime.
Project Idea #3: How Does Temperature Affect Slime?
Like any materials, slime can behave differently depending on environmental conditions. Is slime still slimy when it’s frozen? How about when exposed to high temperatures, or left out in direct sunlight?
- Overview : Explore how temperature changes affect slime’s texture, stretchiness, and behavior.
- Purpose : To investigate whether slime behaves differently in warm, cold, and room temperature environments.
- Materials : White glue, borax or saline solution, water, and access to different temperature settings (freezer, warm water bath, oven, etc.)
- Procedure : Create identical batches of slime and expose each one to a different temperature. Measure and observe how temperature impacts the slime’s stretchiness, texture, and flow over time.
- Scientific Concept : The effect of temperature on polymers and their elasticity. Explore how cooling can make slime more brittle and heating can make it more fluid.
Slime is an example of an endothermic reaction , which means that it absorbs heat (energy) from its surroundings instead of releasing heat into the environment.
Project Idea #4: Slime vs. Oobleck: What’s the Difference?
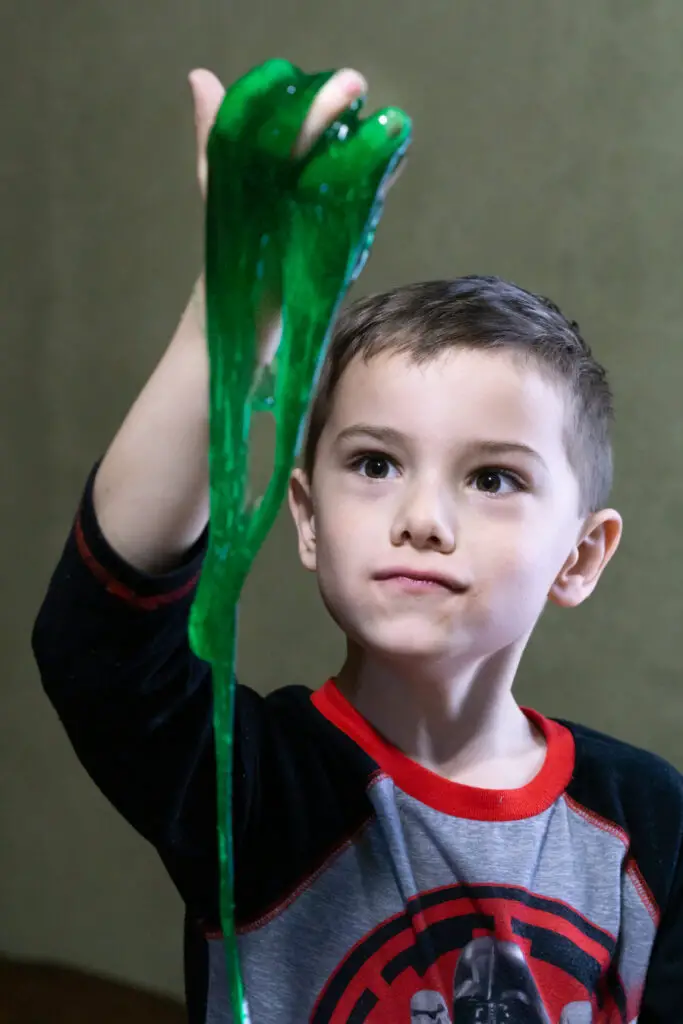
Oobleck is another popular slimy substance that’s easy to make. How does it compare with other homemade slime? Compare and contrast the properties and why they behave the way they do.
- Overview : Compare the behavior of slime to oobleck (a cornstarch and water mixture) to explore the differences between traditional polymers and non-Newtonian fluids.
- Purpose : To learn how different substances can respond to force in different ways.
- Materials : White glue, borax or saline solution, cornstarch, water.
- Procedure : Make both slime and oobleck, then test how each behaves under stress (pulling, poking, squeezing, slapping, etc.) Observe which acts more like a liquid or a solid depending on the force applied.
- Scientific Concept : Non-Newtonian fluids and their unique properties. Examine why oobleck thickens under pressure while slime stays more elastic.
Project Idea #5: Can Slime Be Made Without Borax?
Most slime recipes use a borax solution or contact lens solution with boric acid/borate ions that combines with the glue to make it stretchy. What other slime ingredients can you use to create a similar effect?
- Overview : Create a non borax slime recipe
- Purpose : Explore alternative ways to make slime without using borax, and compare the results to traditional borax-based slime.
- Experiment : Create slime using alternative ingredients like baking soda and contact lens solution, or cornstarch, and compare the texture and stretchiness to a borax slime.
- Hypothesis : Can other substances create a similar cross-linking effect as borax?
We have a borax-free slime recipe you can use!
Project Idea #6: Edible Slime: How Does Changing Ingredients Affect the Texture?
Some slimes look good enough to eat, but you probably wouldn’t want to chow down glue and laundry detergent (one of the main uses for borax.) What ingredients could you use that are safe to eat. What slime recipe could you make that’s actually a tasty treat?
- Overview : Make a slime that’s safe to eat
- Purpose : Create edible slime using safe, food-based ingredients and investigate how different ingredients affect its texture and stretch.
- Experiment : Make several batches of edible slime using ingredients like cornstarch, sugar, and gelatin. Compare their textures, stretchiness, and how they feel compared to non-edible slime.
- Hypothesis : How do edible ingredients affect the slime’s texture and consistency compared to traditional slime?

We have an edible chocolate slime recipe you can use!
Project Idea #7: Can Slime Be Magnetic?
Test to see if your basic slime recipe reacts to magnets ( spoiler : it doesn’t.) What if you could find a way to make slime react to magnets?
- Overview : Create magnetic slime and explore how adding iron filings to slime can give it magnetic properties.
- Purpose : To investigate how certain materials can change the behavior of slime and respond to magnets.
- Materials : White glue, borax powder or saline solution, water, iron filings, and strong magnets.
- Procedure : Make slime and add iron filings. Use a magnet to observe how the slime responds. Measure how far the slime stretches toward the magnet.
- Scientific Concept : Explore the concept of magnetism and how magnetic particles can be suspended in a polymer structure.
Tips for a Successful Science Fair Project
- Using the Scientific Method : Guide students through forming a hypothesis, conducting the experiment, and analyzing results. Check our post on the scientific method for kids.
- Documenting Your Findings : Emphasize the importance of keeping a science journal or recording observations throughout the experiment.
- Presenting Your Project : Create engaging science fair displays with clear explanations of the scientific concepts behind your slime science experiment. You can have the best ideas in the world, though a lack luster presentation can cause people to gloss over it and miss all of your hard work. You’ve got great ideas – spend some effort on presenting them!
Wrap-Up: Slime Science Fair Project Ideas
Science Fair time can be stressful, and you’re going to be (hopefully) spending some time on it. Choose a topic you can have fun with – like slime!
Slime science projects can be fun and creative, and are a great hands-on way to explore important scientific concepts. Whether you tested how different temperatures affect slime, investigated the differences between slime and oobleck, or created magnetic slime, you can dig into hard science concepts like chemistry , physics , and material science .
This should be enough to get started and get the ideas flowing. Use these ideas as a basis for your slime science project or inspiration to create something better.
Keep experimenting, stay curious, and who knows—your next discovery could be just a stretch or squish away!
More Slime!
Find more inspiration in these different types of slime and these spooky Halloween Slime Recipes.
About the author
hevanmiller
Leave a Reply Cancel reply
Your email address will not be published. Required fields are marked *
Save my name, email, and website in this browser for the next time I comment.
Latest Posts
Slime Recipes and Variations: Different Types of Slime
Spread the loveSlime is a popular science experiment and sensory activity, and it’s easy to see why—it’s stretchy, squishy, and endlessly fun to play with! But did you know that there’s a whole world of different types of slime, each with its own unique texture, feel, and even special effects? We’ve got a collection of…

Spread the loveIt’s hard to land on a fun project for science fairs. Slime is always a winning idea. From chemistry to physics, slime provides endless opportunities to explore how materials interact, change, and behave under different conditions. There’s plenty of ideas to make slime the perfect science topic for a hands-on, engaging science project…
The Science of Slime: What makes Slime work?
Unlock the gooey secrets of slime! Learn the science behind how simple ingredients create slime, and learn how to make your own.
Get Your ALL ACCESS Shop Pass here →

Slime Science Fair Project
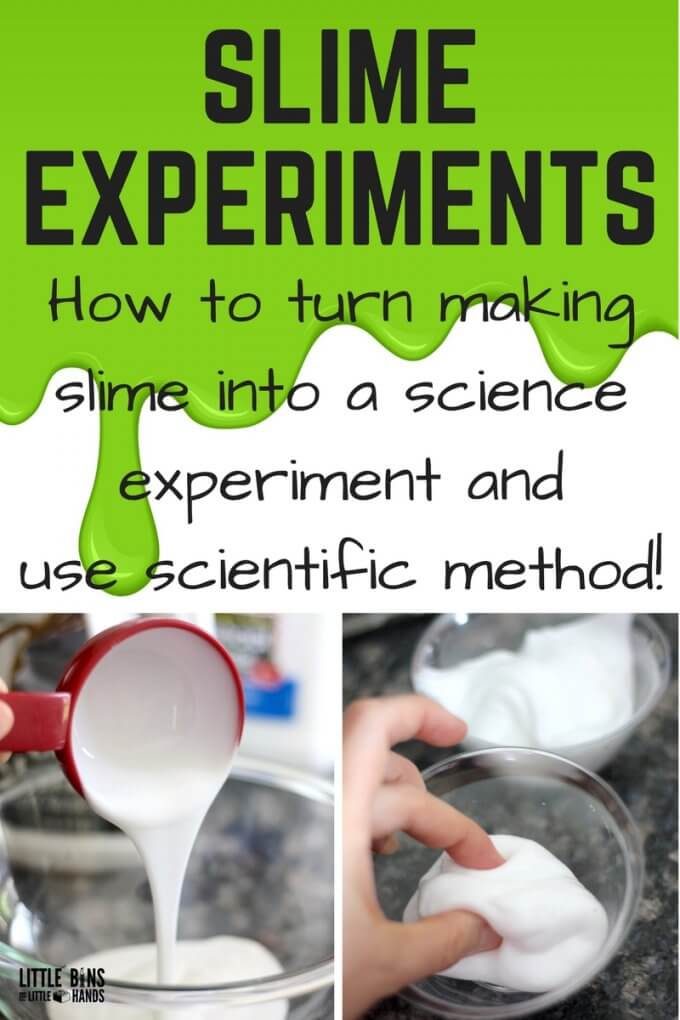
Everyone wants to make slime these days! Did you also know that making slime is awesome science too. If you want your kids to get more out of their slime making experience, turn it into a slime science project and apply the science method too! Read on to find out how you can set up science experiments with slime and have a cool science fair project idea.
How To Make Slime
Homemade slime is a real treat for kids, and right now it’s a super popular activity that also happens to make a great science fair project. We have experimented with our slime recipes over and over again to bring you the best possible activities!
We also have a very cool fizzing slime recipe, watch the video and get the slime recipe here . Two chemistry demonstrations in one!

Which Slime Recipe To Use?
Our easy, “how to make” slime recipes show you how to master slime in 5 minutes or less! We have spent years tinkering with our favorite basic slime recipes to make sure you can make the BEST slime every time!
We believe slime shouldn’t be disappointing or frustrating! That’s why we want to take the guesswork out of making slime!
- Discover the best slime ingredients and get the right slime supplies the first time!
- Make easy slime recipes that really work!
- Achieve awesome slimy consistency the kids’ love!
We have several basic slime recipes that can all be used for your slime science project. You decide which one works best for you depending on what slime activator you want to use. This allows for some flexibility depending on where you live in the world! Not everyone has access to the same ingredients!
Each of the basic slime recipes below have the full step by step photos, directions, and even videos to help you along the way!
- Saline Solution Slime Recipe
- Borax Slime Recipe
- Liquid Starch Slime Recipe
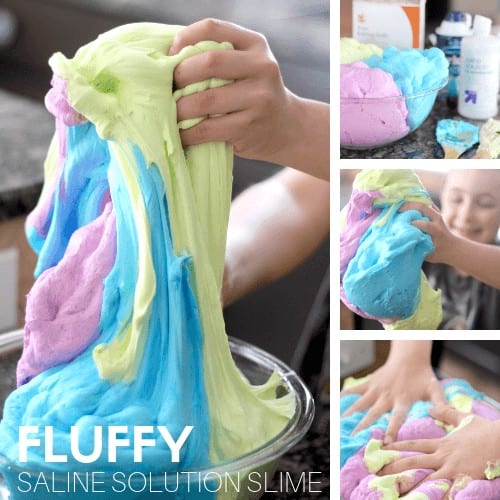
- Fluffy Slime Recipe
Helpful Slime Making Resources To Get Your Started
These are the best resources to look through before, during, and after making slime! We talk more about slime science below too.
- Slime Activator List
- What is slime?
- What You Need To Make Slime
- Amazing Benefits Of Playing With Slime
- Best Slime Ideas
- How To Make Slime Less Sticky
- How To Get Slime Out Of Clothes And Hair
The Science of Slime
Chemistry is all about states of matter including liquids, solids, and gasses. It is all about the way different materials are put together, and how they are made up including atoms and molecules. Chemistry is how materials act under different conditions and/or form new substances. Just like slime!
Slime is an endothermic reaction as opposed to an exothermic reaction. An endothermic reaction absorbs energy (heat) instead of giving off energy (heat). Have you ever noticed how cold your slime gets?
The borate ions in the slime activator (sodium borate, borax powder, or boric acid) mix with the PVA (polyvinyl acetate) glue and form this cool stretchy substance. This is called cross-linking!
The glue is a polymer and is made up of long, repeating, and identical strands or molecules. These molecules flow past one another keeping the glue in a liquid state. Until…
You add the borate ions to the mixture, and it then starts to connect these long strands together. They begin to tangle and mix until the substance is less like the liquid you started with and thicker and rubbery like slime! Slime is a polymer.
Picture the difference between wet spaghetti and leftover spaghetti the next day. As the slime forms, the tangled molecule strands are much like the clump of spaghetti!
Is slime a liquid or solid?
We call it a non-Newtonian fluid because it’s a little bit of both! Experiment with making slime more or less viscous with varying amounts of foam beads. Can you change the density?
Using The Scientific Method
To take your slime making activity from a science demonstration to a slime science experiment, you will want to apply the scientific method. You can read more about using the scientific method with kids here .
Follow this process…
- Figure out a question you want to answer.
- Do some research.
- Gather the supplies.
- Conduct a science experiment.
- Gather data and look at the results.
- Draw your own conclusions and see if you answered your question!
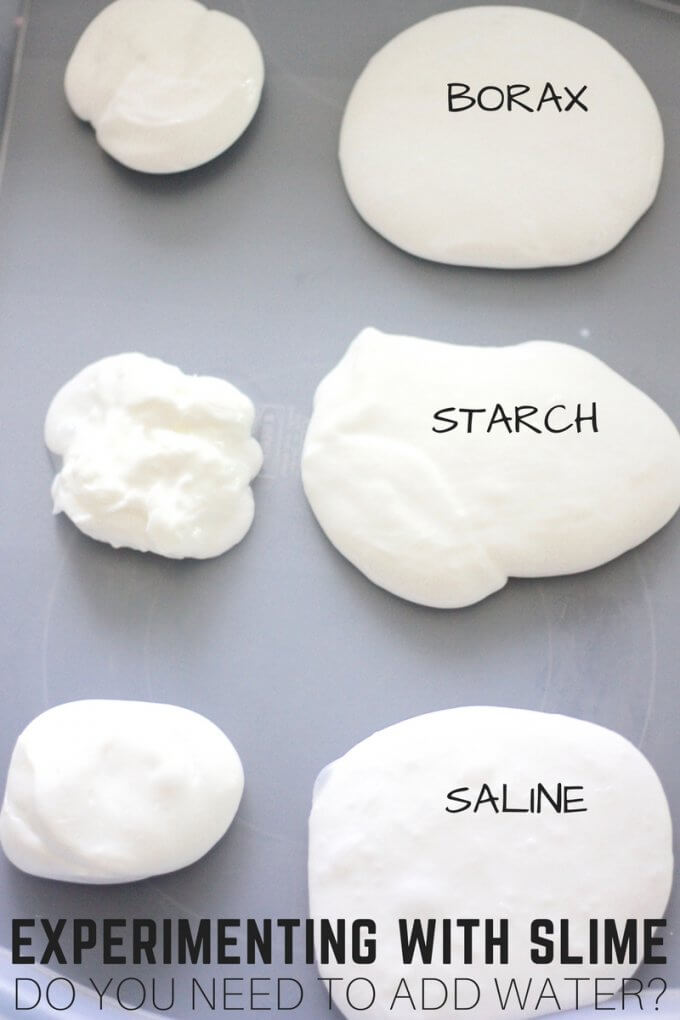
Remember the key to conducting a good science experiment is to only have one variable. For example, water could be a variable. We eliminated the water from our recipe to see if slime needs water as an ingredient. We kept the rest of the recipe exactly the same!
Read more about using variables in science here.
Turn It Into A Science Project
Science projects are an excellent tool for older kiddos to show what they know about science! Plus, they can be used in all sorts of environments including classrooms, homeschool, and groups.
Kids can take everything they have learned about using the scientific method , stating a hypothesis, choosing variables , making observations and analyzing and presenting data.
Want to turn one of these experiments into an awesome science fair project? Check out these helpful resources.
- Science Project Tips From A Teacher
- Science Fair Board Ideas
- Easy Science Fair Projects
Get your FREE printable slime recipe cards!

Slime Science Project Ideas
Can you make your slime more sticky…less sticky…more firm…less firm…thicker…looser??
A good science fair project starts with a good question. We put together a list of ideas for slime science experiments.
TIP: If you haven’t tried out making the slime recipes above already, I recommend that you learn how to make slime first!
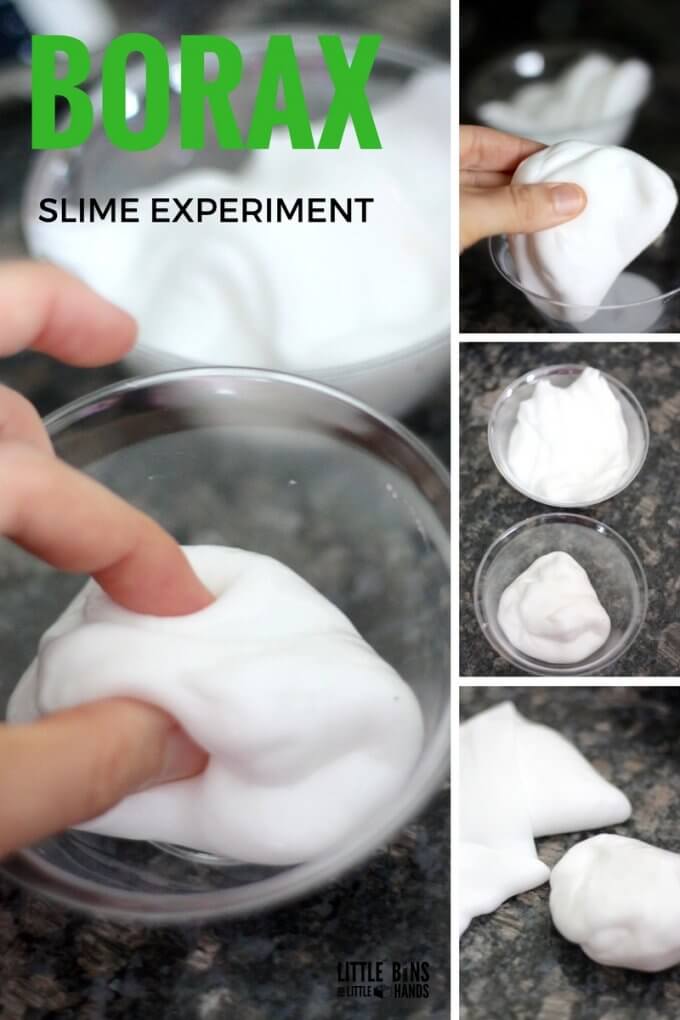
1. Do you need water to make slime?
This was a super fun experiment we tried out and the results were pretty cool! We tested and compared three different slime recipes, but you could do it with just one type of slime and see what happens.
Hint… Liquid starch slime without water is no fun! Try this borax slime recipe or saline solution slime instead if you are just going to pick one recipe.
2. Are All Brands Of PVA Washable School Glue The Same?
This is a great opportunity to test the classic Elmer’s Washable School Glue alongside Dollar Store/Staples brand glue or even Crayola Glue!
The key to this slime science project is to decide how you will compare the different batches of slime made from each brand of glue.
Of course, keep your recipe and method for making your slime the same each time. Think about what makes a good slime… stretch and viscosity or flow and decide how you will measure those characteristics for each slime. Your observations of the “feel” of each slime are valid data as well.
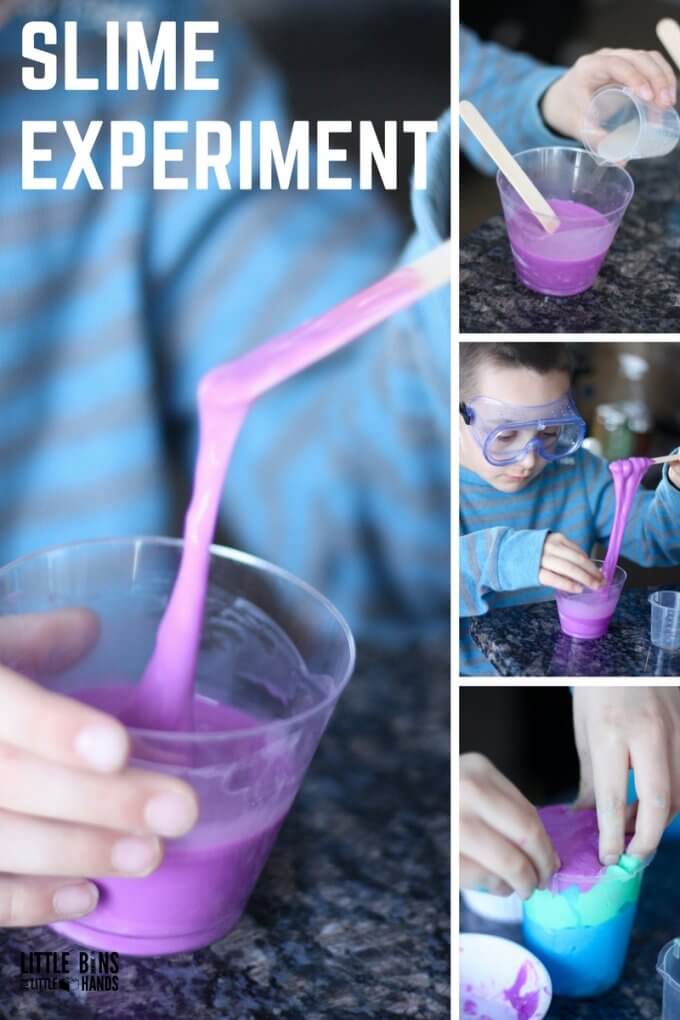
3. What happens if you change the amount of glue in the recipe?
We tried out this slime science experiment using our classic liquid starch slime recipe . This is also how we ended up with FLUBBER !
Decide how you will vary the amount of glue. For example; you could do one batch with the normal amount of glue, twice the amount of glue, and half the amount of glue.
4. What happens if you change the amount of baking soda?
Similarly, to changing the amount of glue, investigate what happens to your slime when you change the amount of baking soda added to the saline solution slime or fluffy slime recipe, Do a batch without baking soda and one with and compare. Baking soda is generally used to firm up this slime recipe.
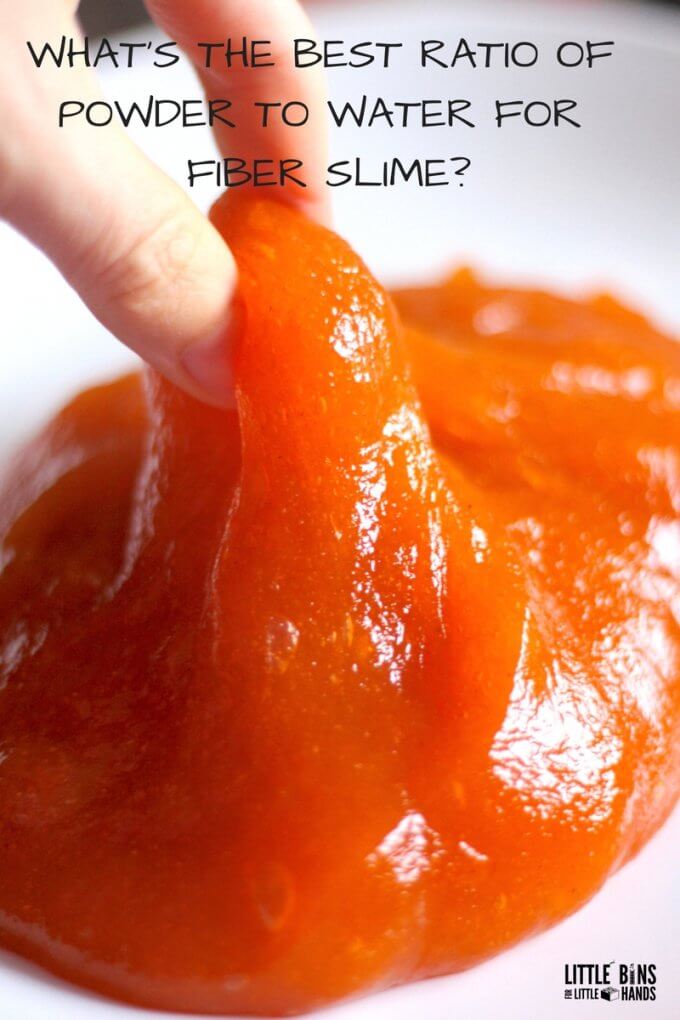
5. B orax Free Slime Experiment
What’s the best ratio of powder to water for a borax free fiber slime? Use our taste safe fiber slime recipe to test your favorite consistency for gooey slime.
We went through several batches to see what worked the best. Make sure to decide ahead of time how you will measure the slime consistency for each batch.
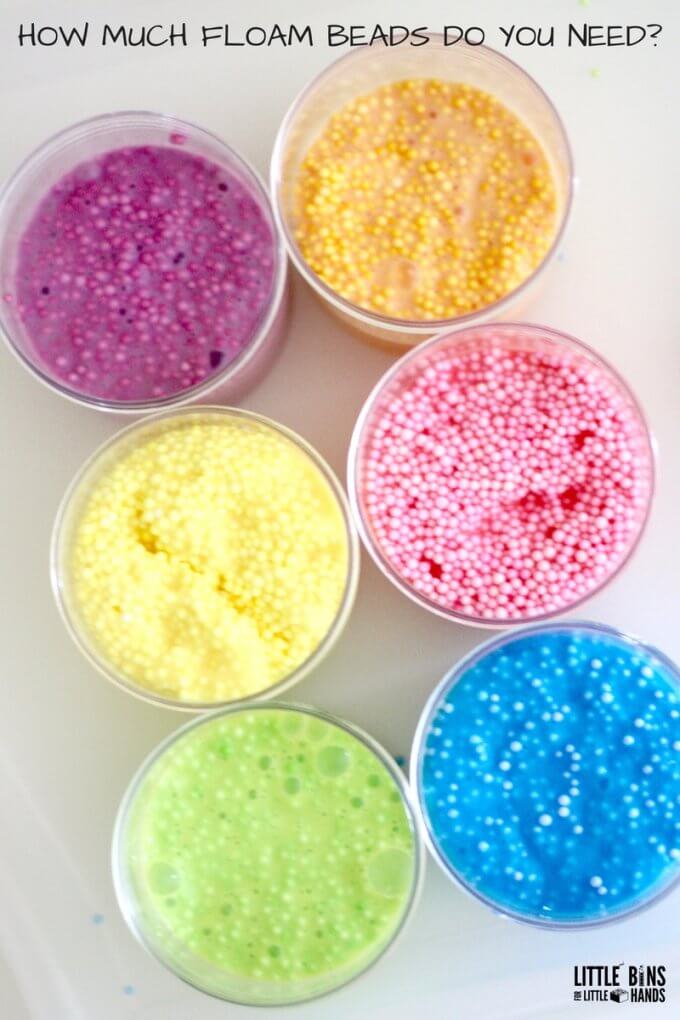
6. What amount of foam beads makes the best floam?
What’s the best amount of styrofoam beads for homemade floam? This is how we tested our floam and recorded the results as we went along. Or you can vary and then compare the sizes of styrofoam beads too!
More Slime Science Projects
What else can you test when it comes to your next slime project? What about…
Clear Glue vs White Glue
Which glue makes the better slime? Use the same recipe for both and compare/contrast the similarities/differences. Does one recipe work better for either clear or white glue?
Does food coloring affect the consistency of slime?
Do different colors have an effect on the consistency of the slime. You can use the standard box of colors, red, blue, yellow, and green to see! Make sure to use all the colors with one batch of slime!
What happens if you freeze slime?
Is slime affected by temperature? What happens if you freeze your slime?
Come up with your own slime experiment!
Try out your own slime science experiment. However, we do not recommend substituting slime activators without knowing what the chemical reaction will be first.
You could…
- explore viscosity
- discover new textures
- learn about non-Newtonian fluids and shear thickening
- explore states of matter: liquids, solids, and gasses
- learn about mixtures and substances and physical properties
More Awesome Slime Recipes To Make
- Fluffy Slime
- Cloud Slime
- Rainbow Slime
- Magnetic Slime
- Glow in the Dark Slime
- Butter Slime
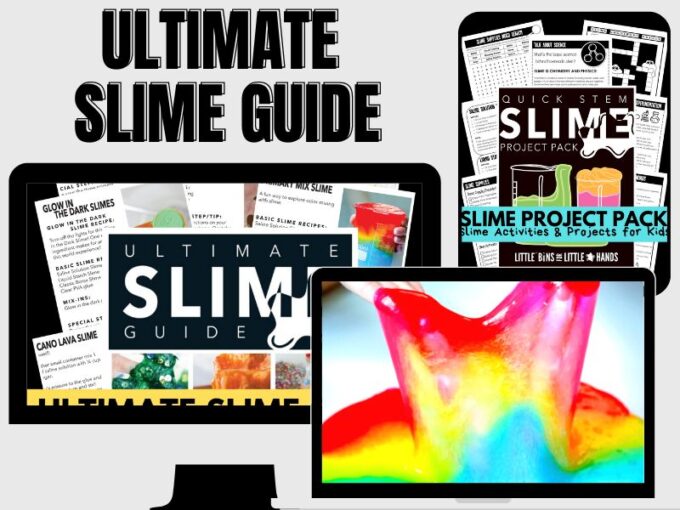
Printable Ultimate Slime Recipes Guide
This is the ULTIMATE collection of slime recipes every kid wants to make! Explore the best recipes and find the right supplies to make slime time a breeze!
Perfect for kids of all ages , including tweens and teens! Taste-safe recipes are perfect for the youngest slime fans.
What’s Included:
- The Ultimate Slime Guide contains all the specialty recipes you or your kids want to make! You’ll find all the best tips, tricks, hints, and slime-y info in almost 100 pages!
- The Ultimate Slime Holiday Guide covers all the best holidays and seasons with special themes and slime-y projects!
- The Ultimate Borax-FREE and Taste-Safe Slime Guide shows you how to make all the best borax-free, taste-safe, and non-toxic slimes kids love, such as marshmallow slime. These recipes do not use chemical activators such as saline solution, liquid starch, or borax powder, making them truly borax-free.
- The Ultimate Slime Coloring Book is an easy-to-print coloring book kids will love! Color and design your favorite slimes!
- The Slime Starter Guide is a fact-filled information guide with everything you need to know to make the best slime ever!
- Slime Science Project Pack helps you turn slime-making into a science lesson!
13 Comments
- Pingback: 25 STEM Activities for Kids You Need to Know | Posh in Progress
- Pingback: Borax Slime for an Easy Slime and Science Activity with Kids
who is the author of this website?? i need to know for a science project
My name is Sarah McClelland.
Everything looks so pretty! I need some help, I can’t find sta-flo liquid starch in my country, I tried corn starch but its too thick,I tried niagara spray and liquid but won’t work either. I need it to be a flubber starch, with iron to do magnetic starch 😀 Any advice is welcome
What country are you in? Can you find saline solution containing boric acid and sodium borate?
Please email me at [email protected]
- Pingback: Crunchy Slime Recipe for Kids With Fishbowl Beads
- Pingback: Recommended Supplies for Making Slime with Kids
- Pingback: How To Make Slime Recipes with Elmers Glue for Kids Science
- Pingback: How To Make Slime Chemistry Activities for Kids Science
whenever i try make slime it never works and the first time i made a home made slime it was way too sticky and to make work we had to mix store bought slime in to make it activate
Well I am happy to help if you want to email me [email protected]
Comments are closed.

Subscribe to receive a free 5-Day STEM Challenge Guide
~ projects to try now ~.


Slimy Science! – Make it a project
[vc_row][vc_column][vc_column_text]
Who doesn’t like slime? You’ll love making it and playing with it! Create a creative and fun Science Fair project out of your fascination with slime. Along the way, learn what it’s like to be a scientist!
What is slime.
There are a lot of different ways to describe different slimes – some alive, some sticky, some gooey, some slippery, and some just plain gross! Slime often results from either a chemical reaction or biological activity. Yep, there is a lot of science behind slime!
Can you believe that “slime” is actually a term that scientists use? For example, biologists have classified hundreds of different species of slime molds and many different species of slime bacteria . Individual slime mold and slime bacterium are so small that you usually can’t see one. But together they can form a big mass or mound (blob) of slime working together as a community for a specific purpose. Smart, huh?
Explore: What slime have you seen? What can you learn about the difference in slime types? What is some of the science behind slime? Want to learn more? Search the internet for:
- Spongebob Squarepants slime mold
- Scrambled Eggs slime mold
- Dog vomit slime mold
- Hagfish Slime
- Glowworm glue
Common homemade slime ingredients
- White school glue – makes slime hold together
- Corn starch – makes slime less sticky
- Contact lens solution or saline solution – make slime more runny
- Borax/sodium borate (soap)* – makes slime feel “wet”
- Shaving cream* – makes slime fluffy
- Fun ingredients (colors, florescence, scents, glitters, etc.) – makes more fun
*Can cause skin irritation, especially if it comes in contact with an open wound.
Explore: Chemically or physically, how do each of the common ingredients affect the slime properties? What other ingredients do you think you’d like to experiment with?
Simple homemade slime recipe.
- White school glue
- Measuring cups & spoons
- 2 Cups or jars
- Disposable stirrer (spoon or stick)
Directions:
- Mix 1/2 Cup water, 1/4 Cup white school glue, and “fun ingredients” in a cup or bowl.
- In a separate cup, add 3-5 Tablespoons of Borax to 1/4 cup water and stir or shake until fully dissolved.
- Mix small amounts (Tablespoons) of the Borax mixture to the glue/water mixture until you are happy with the consistency.
- Have fun! When done, store in zip bag
+ You can find Borax at most large grocery stores next to the laundry detergent.
Explore: What did you learn or observe while you were making your slime? What “how” or “why” questions did you have while you were making your slime? Want to explore other slime recipes? Check out https://www.wikihow.com/Make-Slime .
Now, think like a scientist.
Scientists make observations, ask a lot of questions, then try to find ways to answer those questions. Here are a few questions for you to try to ponder before starting your project:
- What did you observe while you were playing (pulling, touching, pouring, rolling, dropping etc.) with the slime?
- If there was one ingredient you’d like to experiment with changing, then what would it be?
- If there was one thing about the environment around your slime (temperature, surrounding liquid, exposure to air for certain periods of time, etc.), what would it be?
- How do you think changing one of the ingredients or the environment would cause a change to your observations about the slime?
Learn the science behind slime
Okay, you’ve gotten your hands dirty and have had a chance to make slime, play with it, and ask questions! Awesome! Slime is more than just a fun thing to play with and make. Just like everything around you, slime has A LOT of science behind it!
The science behind a topic is called its scientific principles or concepts. Now, it’s time to learn a little more about the science of slime by doing some background research. To do your background research, you can ask an expert, look in books or search the internet. Below are some scientific principles and concepts of slime that would be helpful for you to understand in order to plan your project. When searching the internet, include “kids” in your search to get age-appropriate information. For example, “kids molecule video”.
- Liquids, solids & gasses (Early Elementary School)
- Molecules (Late Elementary School)
- Molecular chain (Middle School)
- Polymers (examples of polymers are white glue, rubber, plastic and DNA) (Middle School)
- Viscosity (Middle School)
- Non-Newtonian Fluids (High School)
Now, be a scientist!
Inquiry science fair project.
If your science fair allows inquiry projects (or demonstrations), then try to answer “why” or “how” questions as part of your project. In your own words, describe the scientific concepts that you learned about and some of the things you observed or discovered. The purpose of an inquiry is to demonstrate what you learned, observed and discovered. Demonstrations are not the same as experiments. But hey, not every scientist is an experimentalist!
Experimental Science Fair Project
When you do an experiment, you choose one thing to change and try to understand the results of that change. This is called Cause and Effect. If your science fair only allows experimental projects that follow “The” Scientific Method, then follow these steps:
- After learning the science behind slime, decide on just one thing that you will change during your experiment and what you will measure. For example, maybe you change the amount or type of ingredient, the environment, timing and you measure the change in texture.
- Write a detailed experimental question that makes it clear what you will change.
- State your prediction as a result of a change that you make.
- Plan how you will set up your experiment, including necessary supplies.
- Determine the potential health and safety risks of doing your experiment.
- Write down a detailed procedure that you can use when doing your experiment.
- Collect and record your data and observations.
- Display your data in a table and graph.
- Look for trends in your data graph.
- Try to explain why your data or observations turned out the way they did.
- Share what you learned with others.
- Create a project board display – refer to Project Display Tips
If you’d like help during each step of your project, then check out Make Science Fair Fun® workbooks . Each of the 22 worksheets will help your child successfully develop their science & engineering skills!
© 2022 STEM World Publishing, Public Benefit Corporation, with permission.
Photo by Erwan Hesry on Unsplash [/vc_column_text][/vc_column][/vc_row][vc_row][vc_column][vc_cta h2=”Want to promote authentic STEM projects at your school?” h2_font_container=”tag:h2|font_size:48px|text_align:left|color:%23a11d21|line_height:60px” h4=”Help us connect with your school district to donate our impactful programs to you and your school community!” h4_font_container=”tag:h2|font_size:24px|text_align:left|line_height:30px” add_button=”bottom” btn_title=”Learn More” btn_color=”turquoise” btn_size=”lg” use_custom_fonts_h2=”true” use_custom_fonts_h4=”true” h4_link=”|||” btn_link=”url:https%3A%2F%2Fstemgeneration.org%2Fprograms%2F|title:Parents%20-%20Inspire!|target:_blank”][/vc_cta][/vc_column][/vc_row]
Similar Posts

Defining Science & Engineering Fair Project Success
After your child has completed their project, they can be sure that they’ve had a successful Science & Engineering Fair experience if they can honestly say they enjoyed the experience and feel confident and proud of what they did.

Supplemental Science Fair Activities
Once you have all of the essential activities planned for your Science & Engineering Fair and have volunteers lined up, then you might consider organizing supplemental activities around your fair. Supplemental activities can include inspiring events, fundraisers, or carrots for student participation.

Create Effective Science Fair Signups
If you want students to participate in your school’s Science & Engineering Fair and for adults to support you during your fair, then you will need signups. Gauge whether online or paper signups will be most effective at your school. Consider that not all families have access to or are receptive to the use of internet tools. We’ve seen schools use online only, paper only, or the combination of the two.

Science Fair Position Statement
We at Science Fair Fun recognize the potential for Science & Engineering Fairs to be ideal incubators for inspiring and empowering our next generation of innovators when those fairs align with the following principles:

The Heart of Effective Mentors
Through my experiences on both sides of mentorship – mentee and mentor – I can confidently say that the most valuable element of an effective mentor has more to do with the mentor’s genuine mindset – the core of where they are coming from and their perceived purpose as a mentor. It is that mindset that subsequently shapes the mentors actions, which defines their effectiveness as a mentor.

How to organize your first Science Fair
You can IMPLEMENT Science Fair Fun takes the stress and guesswork out of organizing and implementing an inclusive and skills-based Science & Engineering Fair at your school. Let us create all of the communication pieces and resources for you to be successful!

Forgetful Momma
Secular Homeschooling
Slime Science Fair Project
We have made a lot of slime in this household. We have used numerous recipes but we have always done it in fun, not looking at the science behind it . Now we are looking to create our own slime science fair project.
This post contains affiliate links, see my disclosure policy for more information.
Add a little school the next time you make slime. It doesn’t have to take the fun out of making, it just means you can cross science off today’s list.
It is time to compare all our different slime recipes. Which one works best?
Using the scientific method, your students are well on their way to discovering the scientific wonders of slime .
slime is chemistry in motion. Chemistry explains states of matter such as liquid, solid, and gas, and it also explains how these states of matter react under different conditions, especially the formation of new substances.
Slime is an endothermic reaction, meaning it absorbs heat (energy) rather than giving it off. This explains why slime gets colder over time. Then, depending on the recipe you use, certain ingredients change the molecular makeup, also known as cross-linking. Your student can use the scientific method to test which slime recipes and ingredients cause which chemical reactions.
Other chemistry concepts that making slime involves are:
- Chemical reactions
- Cross-linking
- States of matter
Slime is a fascinating substance that makes science for kids fun and engaging. It’s a simple science activity that contains some fascinating science .
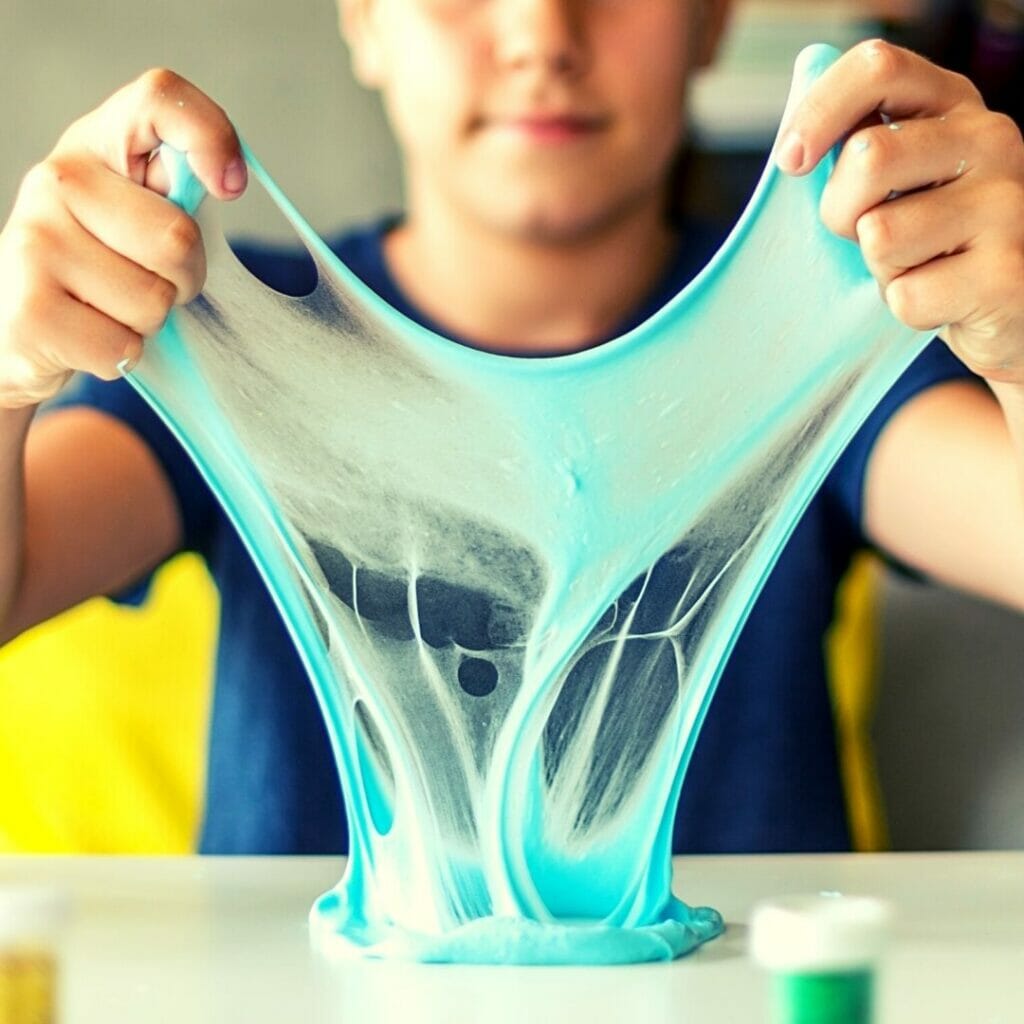
The Science of Slime
We like to compare things. Everything, in fact, in junior high a friend and I compared numerous brands of paper towels to win at the science fair. Yay us! So we compare things here in our homeschool as well. Like comparing different slime recipes.
You can teach your children why glue stays liquid (because it is a polymer made up of identical long strand molecules, called monomers) until a borate ion ingredient is added to the mixture (connecting the long strand molecules together).
Throughout the mixing process, these ingredients begin to form a thick, rubbery type substance, eventually becoming slime.
Homeschool Science Fair Project Planner
Easy Slime Recipes
Use these easy slime recipes and experiment with the elements of slime. Make sure you take good notes so you can use what you learn in your next science project! Consider testing out multiple recipes, or perhaps multiple variants of the same recipe, during your science project and see what happens when you combine different ingredients.
For example, in the borax slime recipe , what happens if you add less borax? Or more? How much borax would you need to add to turn your slime into a rubber ball? There are so many questions and possibilities to discover!
Contact Solution Slime Recipe
Use this contact solution slime recipe and compare it to your own normal slime recipe, or a borax slime recipe , which is what we typically use.
- Bottle of Elmer’s Glitter Glue (6 oz.)
- 1.5 teaspoons (7.5 ml) baking soda
- 1.5 teaspoons (7.5 ml)saline solution (contact solution) with Boric Acid or Sodium Borate in the ingredients
- Spoon or spatula
- Mixing bowl
Instructions
- Empty the bottle of glitter glue into a mixing bowl
- Stir in the baking soda. Mix well.
- Add contact solution and mix until slime forms. You’ll notice it comes together immediately and takes a few minutes to fully form.
- Knead the slime with your hands to get it to a consistency you’re happy with.
What kid doesn't like to get messy and play with homemade slime? This recipe is easy to make and never fails! Just try it and see.
- 1 cup water
- 1 tsp borax
- 1/2 cup glue
- 1/2 cup water
- food coloring - optional
- glitter -optional
- measuring cup
- Using warm water, mix together one cup of water, and the 1 tsp of borax.
- Mix so that the borax dissolves.
- Mix together your half cup of water, and your half cup of glue together. If you are using food color now is the time to do so. If you use clear glue, it is going to be really nice. You can also add in glitter too!
- Mix the two together. I wish I could have gotten a picture of the glue mixing with the borax/water solution as I poured the glue in. A quick stir and you have slime! It really takes next to no stirring for this part.
There was still water left in the cup after mixing the two together, so don't worry if you have left-over water.
On that note, feel free to grab the science fair project planner . Perfect for slime science fair projects or other at-home science experiments.
More Hands-on Learning
Bouncy Egg Experiment – Eggs in Vinegar
Elephant ToothpasteRead More
Shrinking Egg Science Experiment
VanCleave's Science Fun
Your Guide to Science Projects, Fun Experiments, and Science Research
Slime Science Fair Project
By Janice VanCleave
The photo shows pink slime that was colored with food coloring, but I wonder how colored or even glitter glue would affect the properties of slime. UUM! Sounds like a fun thing to investigate.
Having all the information on one scrolling page is too overwhelming. So, I have divided it into separate pages and created an index. Check it out and let me know what you think. If you like it, I’ll create others projects on other topics using the format. If you have a topic you would developed, leave a comment.
SLIME SCIENCE FAIR PROJECT INDEX
Share this:

IMAGES
VIDEO
COMMENTS
Preparing Your Slime. In the mixing bowl, thoroughly mix 1/2 C water, 1/2 C glue, and a few drops of food coloring. Add 1/2 tsp baking soda and mix completely. Add 1 tbsp contact lens solution and stir vigorously until the mixture starts pulling away from the edges of the bowl.
Below, we outline a few simple experiments to assess different physical properties associated with slime. But first, we delve more into the science behind slime. To be honest, there are truly a TON of directions you can go with this project and the fact that it can be completed in a weekend makes it a great last minute science fair project!
The Science of Slime. The fact is, there is a science of slime. For one thing, slime is chemistry in motion. Chemistry explains states of matter such as liquid, solid, and gas, and it also explains how these states of matters react under different conditions, especially the formation of new substances. Slime is a non-Newtonian fluid, meaning it ...
Wrap-Up: Slime Science Fair Project Ideas. Science Fair time can be stressful, and you’re going to be (hopefully) spending some time on it. Choose a topic you can have fun with – like slime! Slime science projects can be fun and creative, and are a great hands-on way to explore important scientific concepts.
We tried out this slime science experiment using our classic liquid starch slime recipe. This is also how we ended up with FLUBBER! Decide how you will vary the amount of glue. For example; you could do one batch with the normal amount of glue, twice the amount of glue, and half the amount of glue. 4.
Zip bag. Directions: Mix 1/2 Cup water, 1/4 Cup white school glue, and “fun ingredients” in a cup or bowl. In a separate cup, add 3-5 Tablespoons of Borax to 1/4 cup water and stir or shake until fully dissolved. Mix small amounts (Tablespoons) of the Borax mixture to the glue/water mixture until you are happy with the consistency.
There are a ton of ways to mix up the ingredients in slime and record how that affects the end result. This makes a perfect science fair project. 6. Engineering slime science. Engineering slime will mean taking our third slime science project idea (mixing up the ingredients) one step further by asking how you can engineer a slime to excel at a ...
Some slime glows in the dark, some is fluffy, and some is even magnetic! What set of properties makes the best slime? What kind of slime would you choose to make if you were selling slime as a toy in your own "slime shop"? In this project, you will experiment with different slime recipes and try to perfect one to make the best slime.
Instructions. Using warm water, mix together one cup of water, and the 1 tsp of borax. Mix so that the borax dissolves. Mix together your half cup of water, and your half cup of glue together. If you are using food color now is the time to do so. If you use clear glue, it is going to be really nice.
Slime Science Fair Project. By Janice VanCleave. Slime is an all time favorite with kids, so I have created a step by step process for a slime science fair project. The photo shows pink slime that was colored with food coloring, but I wonder how colored or even glitter glue would affect the properties of slime. UUM!